The visual editor
The editor is where you draw and change a workflow's graph. Everything here is design-time: you shape the plan, and a mission executes it later — nothing runs from the editor itself.
Only a draft is editable — a published version never changes.
Opening the editor
Open a workflow from the workflow list. What you get depends on what you opened:
- A draft opens fully editable: the palette is on the left, every node and wire can change, and Save Draft and Publish are available in the toolbar.
- A published version opens read-only. You can inspect every node, wire and setting, but no palette is rendered — there is nothing to add or remove. To change a published workflow, you create a new draft, usually by cloning (see the workflow lifecycle).
If you are looking at a graph and cannot find the palette, you are in a read-only view — check which version you opened.
The canvas
The canvas is the graph itself: nodes, wires, and the execution spine running through them.
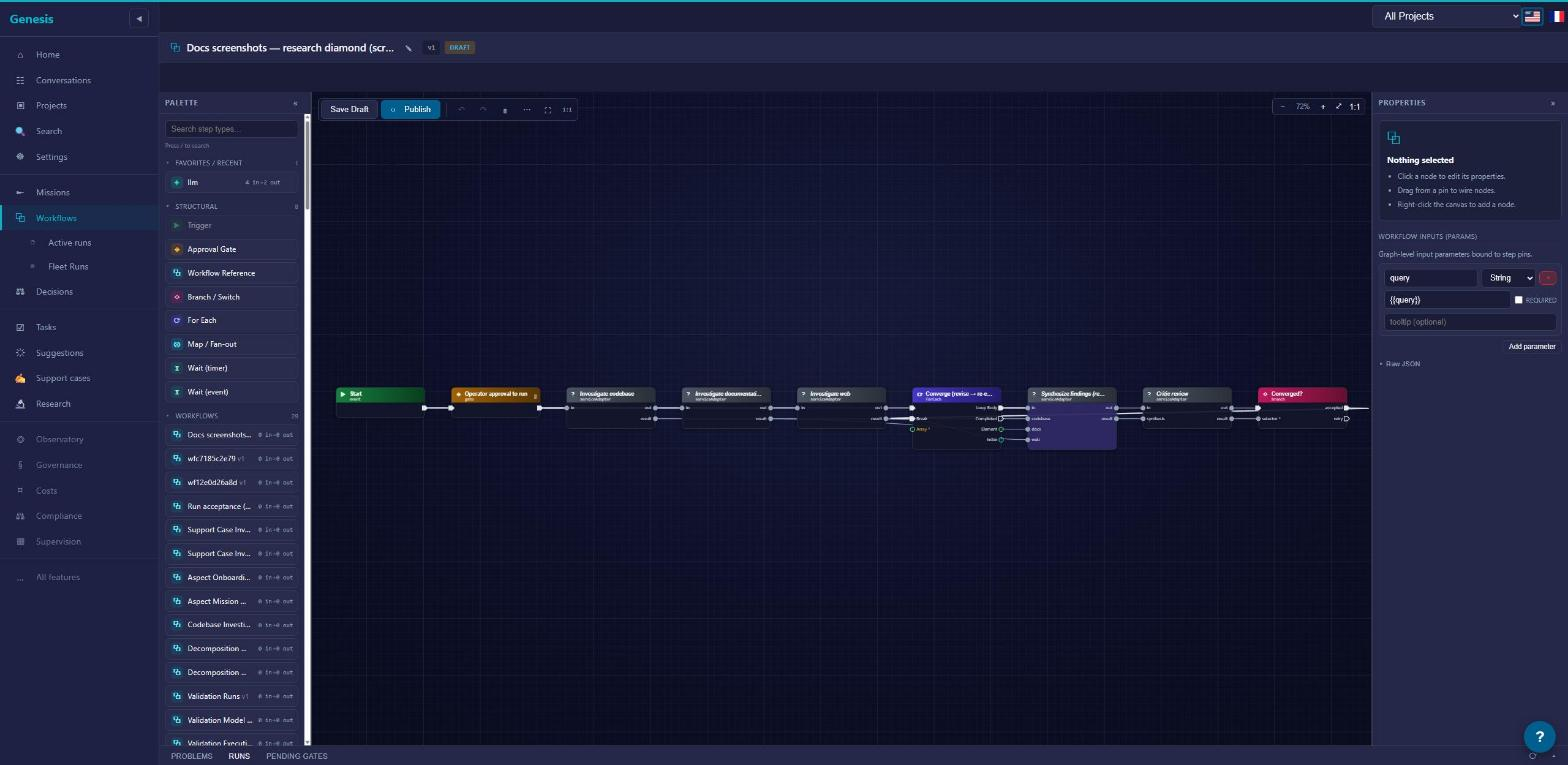
Two things worth knowing before you start dragging:
- Layout direction. A toggle switches the canvas between
LR(left-to-right) andTB(top-to-bottom) layout. It only changes how the graph is drawn — the graph is identical either way. Wide, shallow graphs usually read better inTB; long pipelines inLR. - Live wiring. Drag from any pin and the canvas answers as you move: pins that can accept the wire light up, pins that can't stay dark. Release on a lit pin to connect; release anywhere else and nothing happens.
Click a node to open its settings panel; drag it to reposition it.
The palette
The palette lists everything you can place — 138 node types across 17 categories, plus a structural section.
- Categories group nodes by domain (Missions, Workspace, Git, Review…). Each category collapses and expands, so you keep open only the ones you use.
- Favorites / Recent lets you pin the nodes you reach for constantly to the top of the palette.
- Structural is the control-flow section. Its tiles are not catalog nodes but the shapes that organize them: Trigger, Approval Gate, Workflow Reference, Branch / Switch, For Each, Map / Fan-out, Wait (timer) and Wait (event) — plus Comment, a titled annotation frame you place behind nodes to describe a region of the graph; it is purely descriptive and never runs.
- Workflows lists published workflows as tiles — drop one onto the canvas to embed it as a sub-workflow reference.
- Shortcuts holds composite emitters, like the Research shortcut that drops a preconfigured research step (an LLM service step, or a coder configured to analyze).
To place anything, drag its tile onto the canvas — or just click the tile and it is added, ready for you to position.
The full catalog, category by category, is in the node palette. What each structural tile does is in control flow.
Wiring and pin compatibility
Every node exposes pins. The in/out pair is the execution spine — it decides order. The other pins carry typed data between nodes: Exec, Context, String, Bool, Json, Artifact. Most nodes deliver their output on a Json pin named result.
The editor enforces types while you wire: a String output only connects to inputs that accept a String, and the highlight during a drag shows you exactly which pins those are. You cannot create an ill-typed wire, so a graph that wires up is a graph whose data at least fits together.
What each pin kind means, and how the spine relates to data flow, is covered in anatomy of a workflow.
Presets on a draft
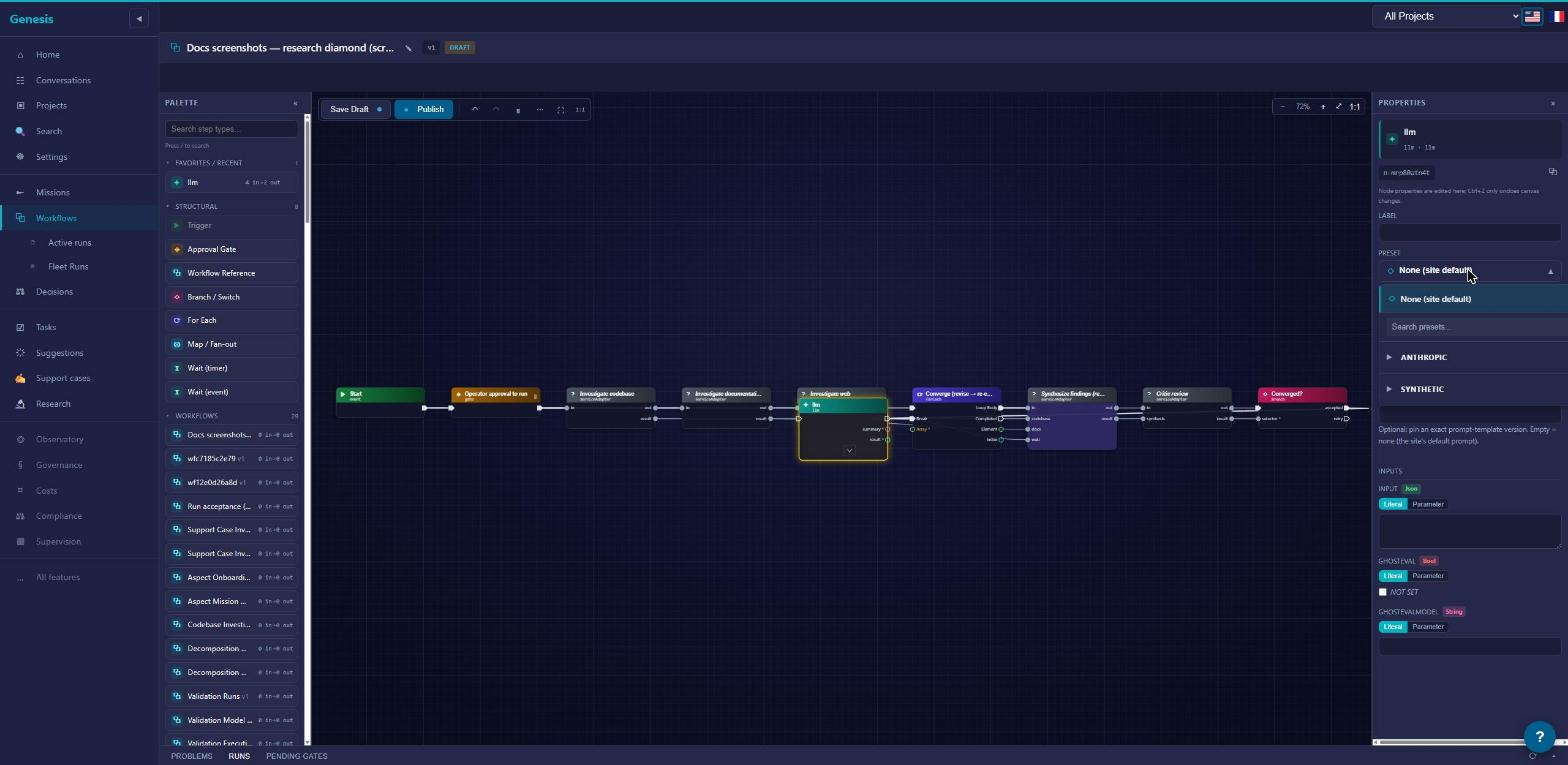
Generative nodes carry a preset selector: pick a preset and the node is bound to that model/provider bundle.
What you choose on the canvas is the authored default, not the last word. At dispatch, preset bindings set at any scope (global, project or customer) are resolved and the most specific one wins — it beats what you authored here. If nothing is bound anywhere, the run falls back to the baked-in default rather than failing. Details in presets.
Setting node instructions
A node's task text lives in its Instructions field: select the node and write it in the settings panel. It is part of the graph — publishing freezes it with everything else.
Coder and agent nodes can additionally carry an instruction binding — override text that replaces the authored instructions at dispatch, without touching the published graph. Bindings, their scopes and precedence (run > project > tenant > global) are covered in node instructions.
Publish is the validation step
There is no separate Validate button. In the editor, clicking Publish runs the whole validation — the Problems panel's own empty state says it: "No problems. Publish to validate." If anything is wrong, the publish refuses and the panel reports everything it finds at once — one exhaustive problem list, not a stop at the first error. Work down the list, fix, and publish again; it goes through once the list is empty. (Agents can run the same checks as a dry run, without attempting a publish, via the workflow_validate_draft MCP tool.)
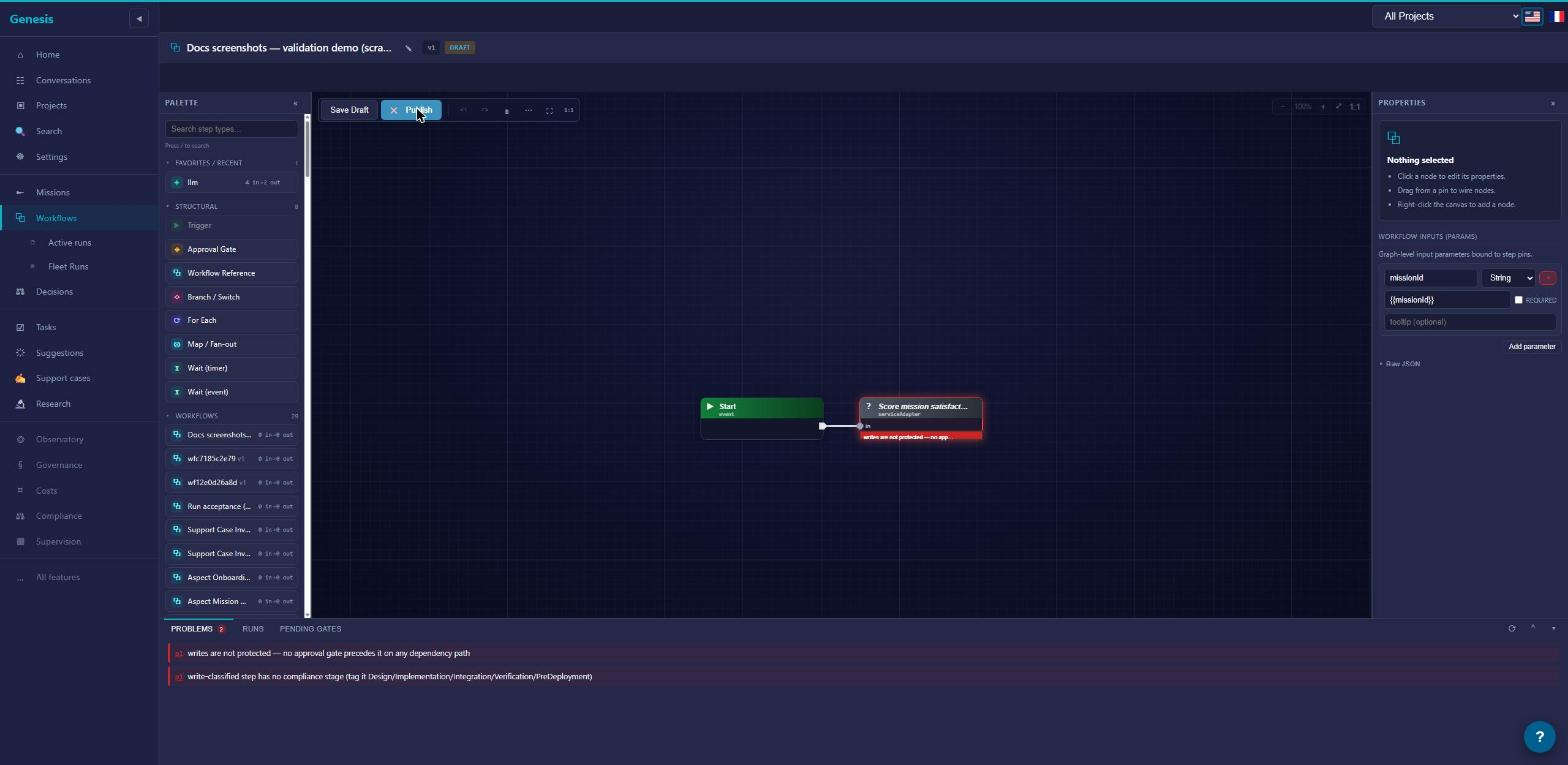
A successful Publish freezes the draft into an immutable published version — from that point the graph never changes (see the workflow lifecycle).
If your draft is governed — it writes somewhere that requires controls — publishing from the editor injects the required control nodes as part of the publish itself: they land in the published graph marked as injected (runs badge their origin), rather than appearing on your canvas first. To review injected controls before publishing, use the agent path: the workflow_materialize MCP tool writes them into the draft, where you read them like any node you placed yourself. What makes a draft governed, and which controls arrive, is in governance.