Build your first workflow
In this tutorial you build a five-node workflow from nothing, publish it, and run it on a mission. It takes about twenty minutes and assumes nothing beyond What a workflow is — the short version: a workflow is a saved graph of steps that executes nothing by itself; a mission runs it, and you accept the result.
What you'll build
A tiny create-read-review-write pipeline, five nodes in a line:
- A workspace create node opens a run-scoped workspace and hands out its handle — every read and write below needs that handle wired in.
- A workspace read node loads a file from that workspace.
- An llm node drafts an improvement to it, in one bounded model turn.
- A gate pauses the run so you can check the draft.
- A workspace write node saves the approved text.
The gate is the heart of the exercise. Every path to a write must pass a gate. The validator enforces this rule — a graph where generated content can reach a write without a human checkpoint will not publish.
Create a draft
- Open the Workflows page and click New Workflow.
- Name it —
my-first-workflowis fine. - The editor opens: empty canvas, palette on the side.
A draft is the only editable state, and a draft can't run. Nothing you do here executes anything yet.
Place and wire nodes
- From the palette's Workspace category, add a workspace-create node. It produces the workspace handle that the read and write nodes require.
- From the same category, add a file-read node.
- Add an llm node. In its panel, tell it what to do — for example: "Suggest one concrete improvement to this file, as plain text."
- From the palette's Structural section, add an Approval Gate — drag the tile onto the canvas, or click it to add. Give it a label ("Review the suggestion") and instructions for the person deciding — that's you, later.
- Add a file-write node and give it a target path.
Now wire the graph:
- Connect the execution spine first: each node's
outpin to the next node'sinpin — create → read → llm → gate → write. The spine is what fixes execution order. - Wire the workspace handle: the create node's
workspaceoutput to theworkspacepin of both the read node and the write node. These pins are required — leave one unwired and the graph will not publish. - Connect the data: the read node's
resultto the llm node's input, and the llm node'sresultto the write node's content.
Note where the gate sits: between the model and the write, so nothing the model produces is saved without you.
Publish — and read the problem list
Click Publish. In the editor, publishing is the validation step — the Problems panel's own empty state says it: "No problems. Publish to validate." The validator checks the whole graph, and if anything is wrong the publish refuses and the Problems panel reports every problem at once — one exhaustive list, not a fix-one-and-retry loop. Typical first-workflow entries: a required pin left unwired, a write that no gate guards. Work through the list top to bottom, then publish again; it goes through once the list is empty. (Agents can run the same check on demand, without attempting a publish, via the workflow_validate_draft tool.)
When the publish succeeds, the graph freezes: version 1 is now immutable, and every run of version 1 — today or next year — executes exactly what you just drew. To change anything, you edit a new draft and publish version 2. Details in the workflow lifecycle.
Run it on a mission
A workflow executes nothing by itself, so give it a mission:
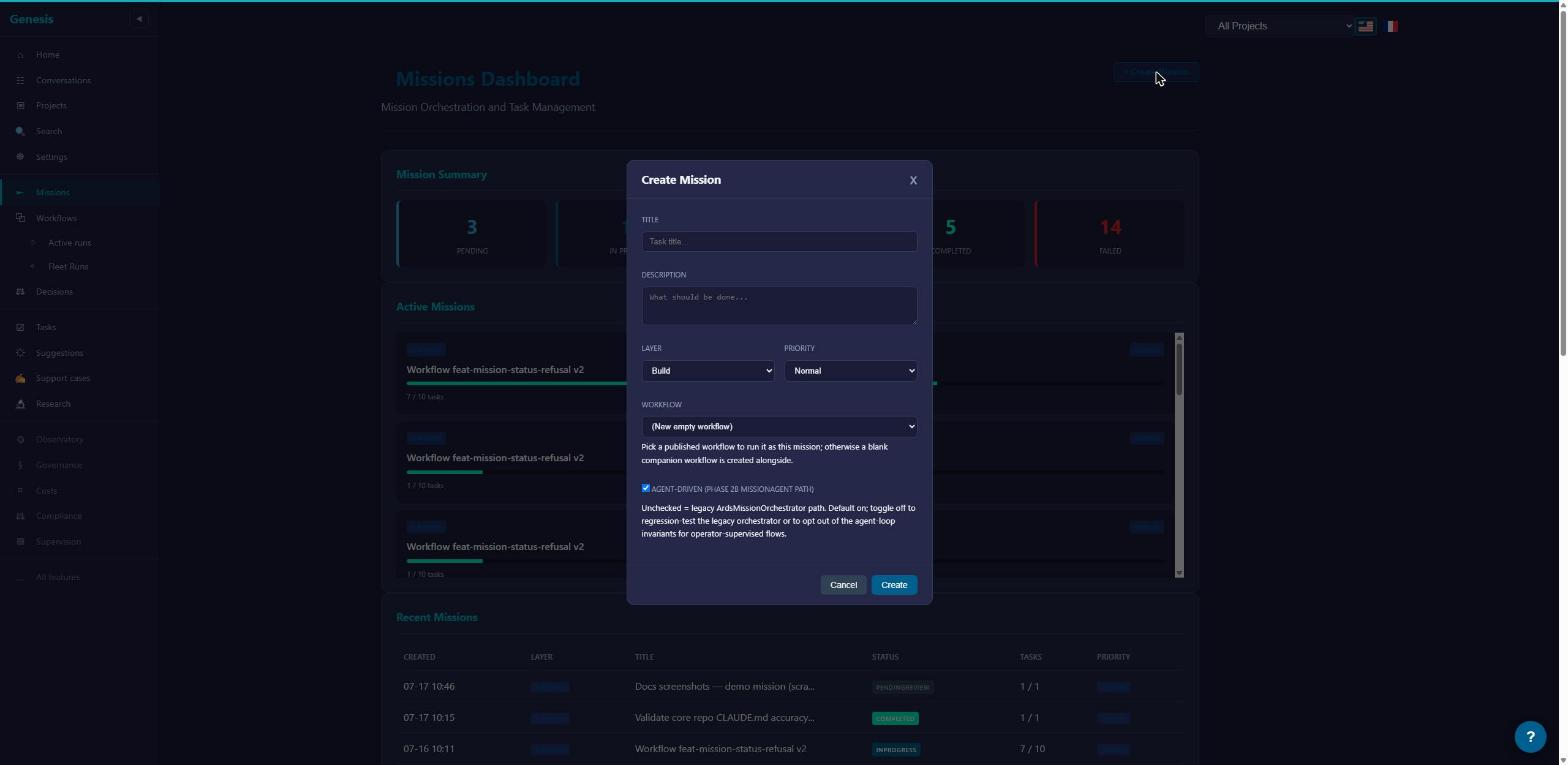
- Open the Missions dashboard and create a mission.
- The creation dialog offers a workflow selector, set to (New empty workflow) by default. Pick
my-first-workflowinstead. - From the mission page, start a run.
The other direction works too: Invoke on the workflow's own page creates a fresh mission around it.
One prerequisite: the run needs a model and provider. If neither the node, a preset, nor your tenant's configured defaults name one, the run refuses to start.
The gate pauses for you
When the run reaches your gate, it stops. No timer pushes it past you, and no gate ever approves itself — auto-resolution exists only as an explicit per-gate opt-in, and you didn't opt this one in.
The pause arrives as a card in your Decisions queue, carrying the label and instructions you wrote, plus the llm's draft, frozen exactly as the run sees it. Read the draft, then click Approve. The run resumes and the write executes — into the run's isolated workspace, not your repository. (Gates can also capture typed answers, offer named decisions, and time out — see gates.)
Accept the run
When the run finishes, it appears on the mission page as Proposed: work done, nothing landed. You have two outcomes:
- Accept run — the merge is validated mechanically before anything lands; if the system can't verify it, acceptance refuses rather than taking anyone's word for it. On success the run becomes one changement on the mission's branch.
- Not accepting it — nothing landed, so there is nothing to undo. There is no decline button: you can simply leave the proposal where it is, and agents can drop it explicitly with the
mission_run_discardtool. (The board's other button, Close-out…, belongs to acceptance — it opens the leftover checklist that unlocks Accept run.)
That's the whole loop: the gate guarded the write inside the run, and acceptance guarded your mission. Runs, acceptance & changements covers what acceptance does in depth.
Where next
- The visual editor — everything the canvas, palette and presets can do.
- Control flow: gates, branches & loops — typed gate fields, branching, fan-out over up to 1000 items, waits from 1 minute to 28 days.
- The workflow lifecycle — versions, triggers, cloning and archiving.
- Runs, acceptance & changements — the changement stack, revert, competing runs.